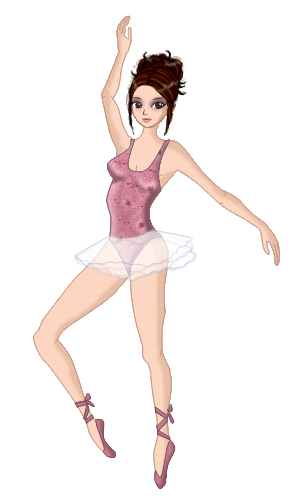
I will create a simple ballet outfit to demonstrate how I edit. Here is a chart showing the tools a most often use when editing.
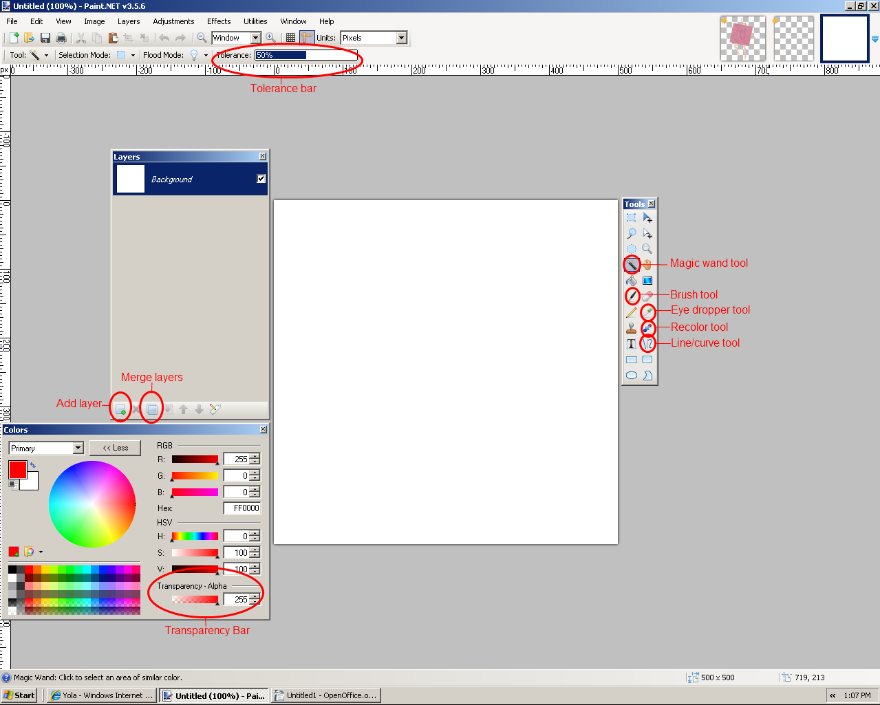
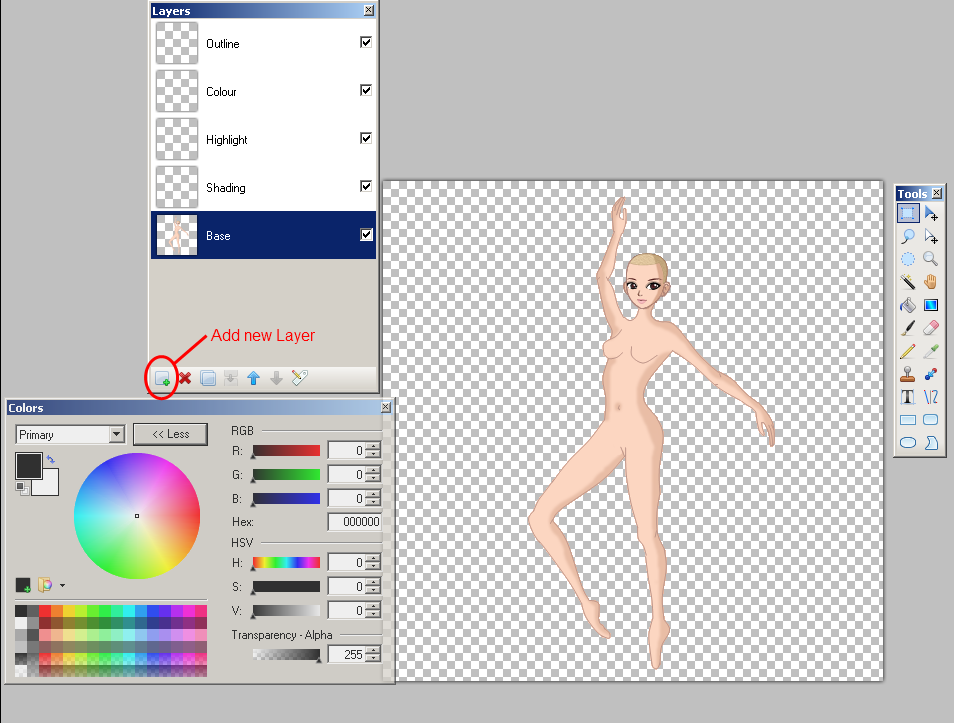
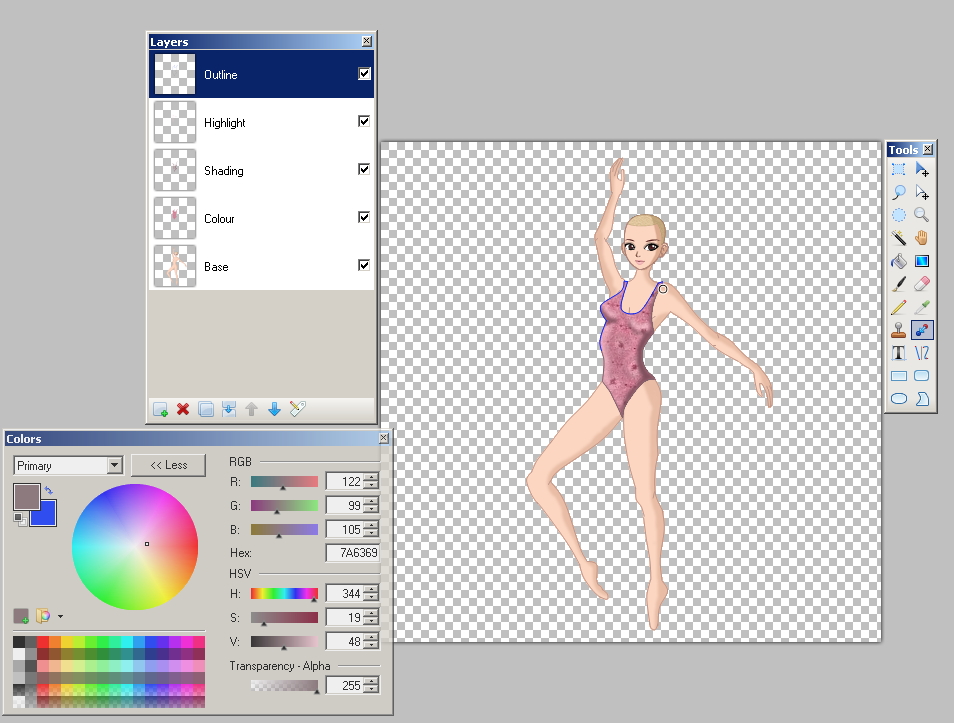
SET UP
To begin editing you must first have a base on a transparent background. Open a new page and create a new layer , the new layer will be transparent so keep this one and delete the white layer. Paste your base onto this layer and name it Base (to do this just double click on the thumbnail) also create new layers and name them Shading, Highlights, Colour and Outline.
DRAW OUTLINE
Click on the layer named outline and using the line/curve tool draw your garment. Ensuring that you create a complete shape with no openings.
The colour doesn't matter at this point as we will change it later.
Note: You may find it easier to draw a rough guide using the brush tool and then creating a good copy on a new layer using the rough one as a guide.

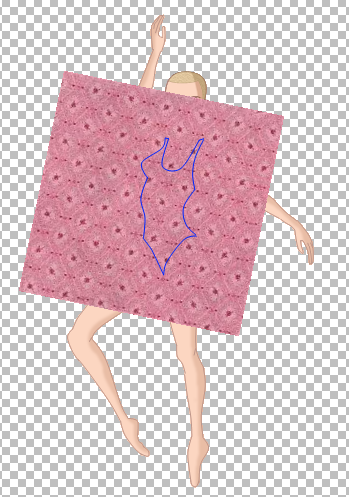
MAKING FABRIC
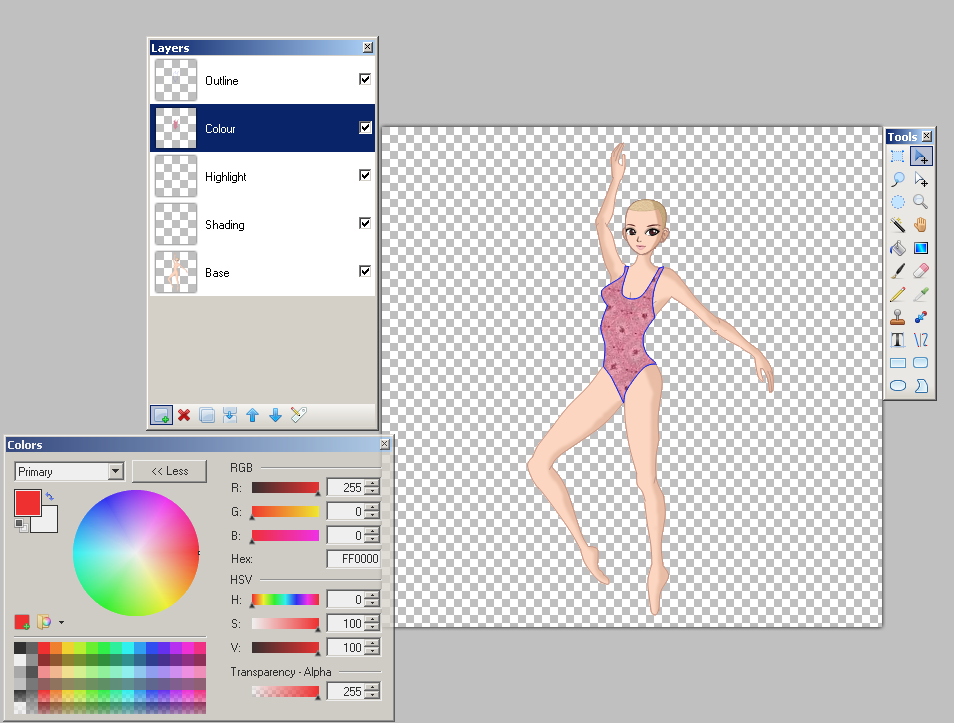
1.Select either a solid colour or use an image off the Internet to create a "fabric". I have taken a picture of a fabric I like and simply pasted it to the "colour" layer. Adjust so that the pattern is showing inside the outline to your liking.
2. Now select the outline layer and using the magic wand tool select the area around the outline shape.
Note. If the area inside is also selected double check for gaps or turn down the tolerance a bit.
3. Keeping this shape select the colour layer and press delete on the keyboard. This will leave you with the correct shape to fill your outline.
 | 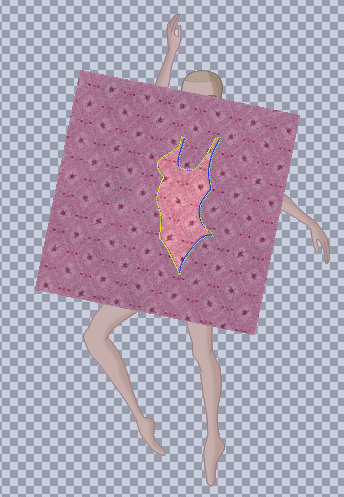 |
The result should look something like this.
Now that you have your base fabric its time to add shading and highlights. The process is exactly the same for both, Ill do shading to demonstarte.
A trick to keep things neat is to use the magic wand tool to select the area outside of the outline like you did to cut the fabric layer and inverting it by pressing Ctrl+i. This will allow you to colour the inside of the shape without going outside the lines
Note. Use the eye dropper tool to pick up colour from the fabric and use the "colors" window to adust the depth.
Select the shading layer and using a darker colour roughly draw in the areas that need shading.

Next go to the Effects tab at the top of the screen and select Blurs - Gausian Blur. A window will pop up, use the bar to select the degree of blur.
You can further blend the
You can further blend the shading by double clicking on the shading layer and turning the transparency down.
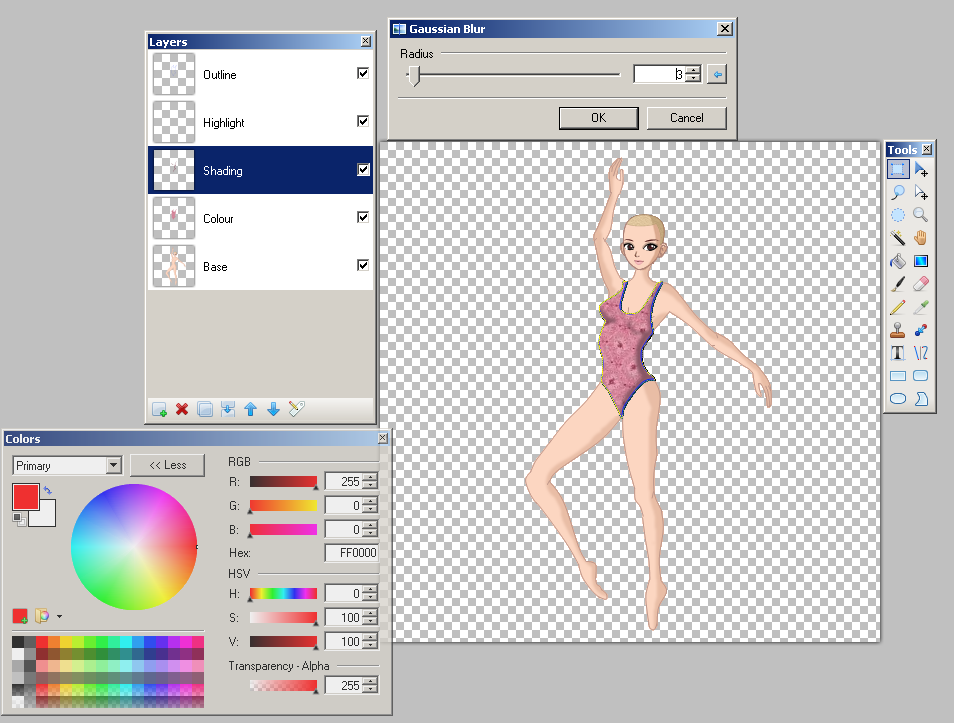
You can further blend the shading by double clicking on the shading layer and turning the transparency down. Create as many shading layers as you think nessisary, try using a range of colours to shade different areas and build up the shading until you are happy with the effect. When you are happy merge all shading layers together to create one single layer.
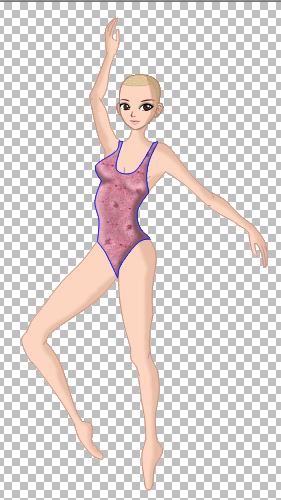
Repeat for highlights.
Now all that remains to be done is to change the colour of the outline. Select a colour slightly darker than the fabric colour and use the recolour tool to change the colour.
To do this select the colour of the outline (blue) as the secondary colour (right click on the colour to make it secondary) and select the colour you would like it to be (dark pink) and recolour the lines. Now you can merge the shading, highlights and outline colours together to create on peice.
Use this techinique to create each element seperatly (ed, tutu, leotard, shoes, hair ect) Merge all layers together by pressing Ctrl+Shift+F
Save your finished work as a PNG. to keep the transparent background.
Good luck with your editing